Below I’m going to show you how I installed and setup Proxmox.
You’ve acquired the perfect home server for you and now it’s time to install a Hypervisor so you’re ready to get your services in place.
Proxmox has all the Virtual Machine management, scheduling and backup features you’d expect from a Hypervisor, additionally Proxmox has free and paid for licence tiers and is well supported and documented.
While setting up I needed to pull from several sources to complete the installation, which I’ve detailed below.
Prepare the installation media
The first thing you need to do is get Proxmox onto a bootable USB so you can install it onto your barebones home server.
You’re going to need 3 things:
- USB Drive with at least 4GB of space
- Proxmox downloaded
- Balena Etcher downloaded
You can download Balena Etcher from here https://etcher.balena.io/. They have installs for Windows, Mac and Linux. You can install Etcher or download a portable executable – either works fine.
You can download Proxmox from the first step here: https://www.proxmox.com/en/proxmox-virtual-environment/get-started
Then plug your USB in, Open Balena Etcher and the steps are pretty simple.
Select the ISO, the USB device and click flash.

Once that’s complete, you can stick it into your home lab computer and you’re ready to install!
Installing Proxmox
After plugging the Proxmox install USB stick into the computer, restart and enter the boot manager. You can normally do this by pressing one of the F-keys (F8 – F12), it varies by device.
When you see this screen, you’ve done it right.

Virtualization error

If you see this warning, you need to go into your BIOS and enable virtualization.
Harddisk options
Otherwise, agree to the licensing and then you need to select a hard drive to install to.
Filesystem options

Mirror hard drives

There’s a lot of choice for the Harddisk options.
If you don’t have many hard drives then choosing ext4 is an easy choice – but if you want or need some redundancy RAID1 will give you some protection when a drive fails.
Finishing the installation
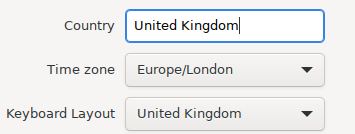
After that you’ll need to configure your locale, then password and email.

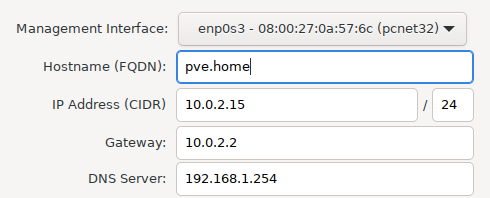
Network Configuration is the last installation screen that requires your input. If you don’t know much about this then 99% of cases it will work with default values.
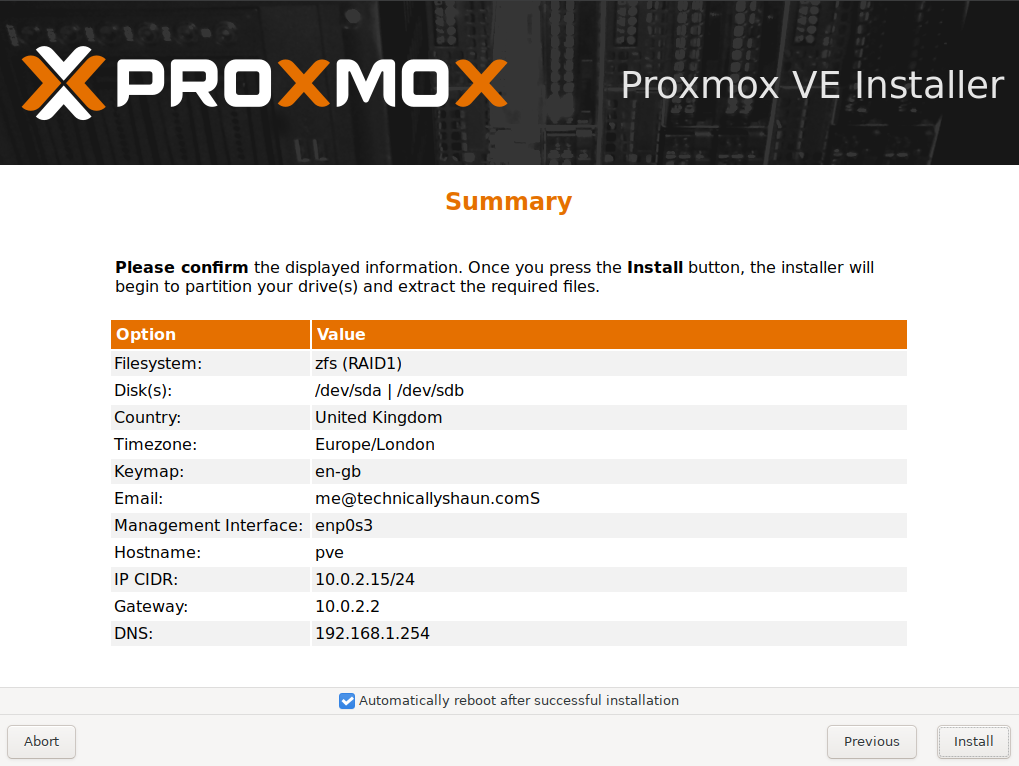
And finally is the Installation Summary page.
Then for some loading bars, and once installation is complete you’ll see this screen.

Nearly finished!
Final tips
Logging in
In order to login, you’ll need to open a browser and navigate to the URL listed on the welcome page (for me it’s https://192.168.1.144:8006/).
You username is root and the password you entered during installation.

Licence tips
No valid subscription popup message
If you’re using Proxmox without purchasing a subscription, you’ll get a popup message every time you login.

To stop this from happening you can run a command.

Click your server name, and then select Shell and then enter this command:
sed -Ezi.bak "s/(Ext.Msg.show\(\{\s+title: gettext\('No valid sub)/void\(\{ \/\/\1/g" /usr/share/javascript/proxmox-widget-toolkit/proxmoxlib.jsUpdate package fails
By default Proxmox points the enterprise update mirrors. If you’re not paying for access, your server will fail to update.

Navigate to your server, and click Repositories
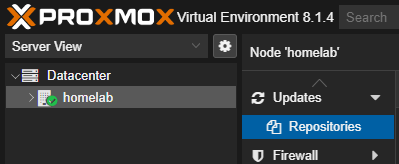
You’ll see a warning at the top of the page.
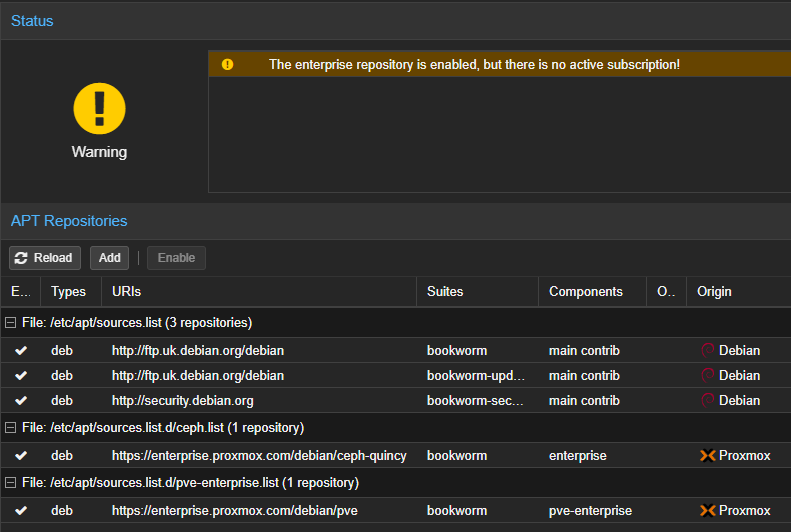
Go down to the grid:
- Select Add and choose “No Subscription”.
- Then Add again and choose “Ceph Quincy No-subscription”.
- Disable the two Components that are “enterprise” and “pve-enterprise”
You’ll still have a warning, however…
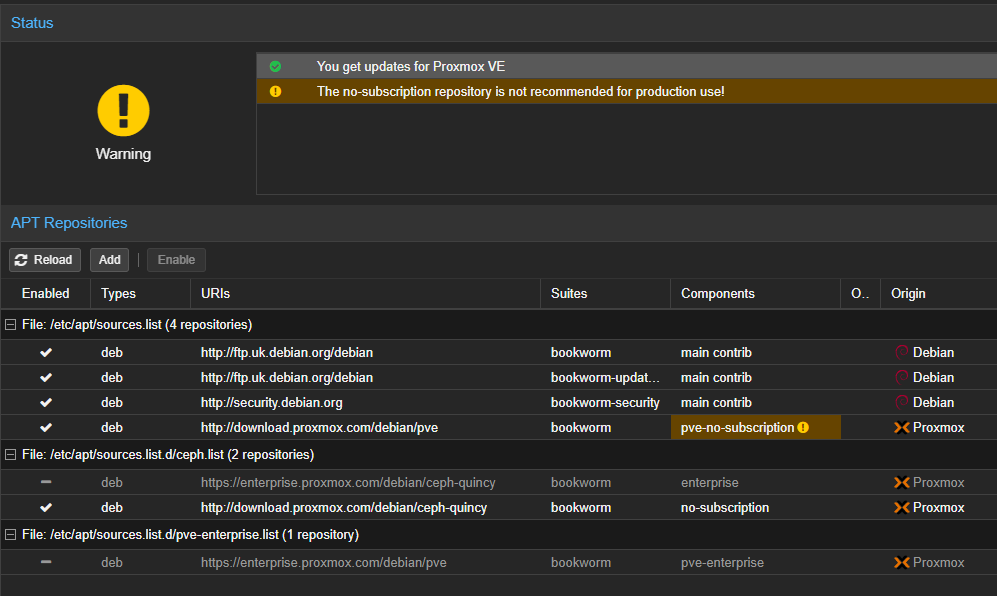
…your packages will update with the default schedule.

This is great for a base to start setting up Virtual Machines and starting to host some services. Next I’m going to look at the common tasks I do when setting up a new Virtual Machine.
